Create Studio Flow
Overview
- The main purpose of the Studio Flow is to route the incoming conversations from custom channels into Twilio Flex
- It is recommended to create 1 Studio Flow per custom channel.
Instructions
- Login to Twilio Console and under
Studio, click the buttonCreate new Flowon the top right corner. - For
Flow Name, input a friendly and yet descriptive name (i.e.Flex - LINE Flow,Flex - Viber Flow) - For
Template, selectStart from Scratch - Within the Studio Flow, drag-and-drop the
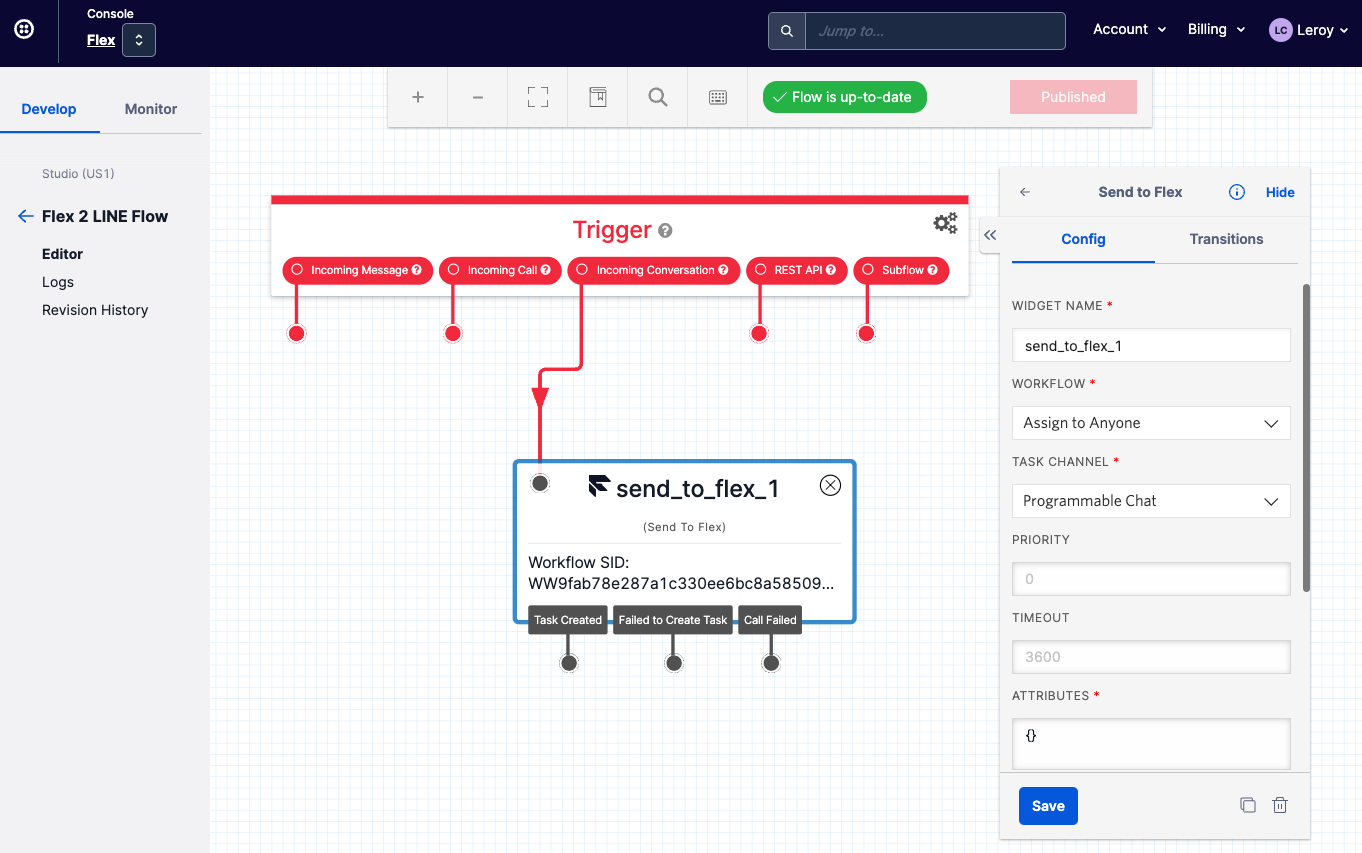
Send to Flexwidget into the canvas. - Configure the
WorkflowofSend to Flexwidget to any chosen TaskRouter workflow. You can choose the defaultAssign to Anyoneworkflow. - Configure
Task ChannelofSend to Flexwidget. Select the Task Channel that you have just created created (i.e.googlechat,instagram,line,viber). - Connect the
Incoming Conversationtrigger toSend to Flexwidget and clickPublish. Do remember to clickPublishotherwise the Studio Flow will not be activated. - The resultant Studio Flow should look similar to the image above.
- Take note of the Flow SID which starts with
FWxxxx- To obtain the Flow SID, click the back arrow button on the left-hand side menubar. The Flow SID will be displayed under your Flow name
info
It is recommended to create 1 Studio Flow per custom channel. Take note of each of the Flow SID(s) that you have created as it will be required to inserted as environment variable(s).
Known Limitations
Send MessageWidget andSend and wait for replyWidget does not work with custom channels